Setting up automated testing for a small client-side Javascript project
The frontend community has released open source client-side code for years—jQuery plugins, modals, tooltips, carousels, and other libraries for web interfaces. But it wasn’t until recently that we’ve seen robust tools and workflows for testing these kinds of projects.
The purpose of this article is to describe how to set up automated testing for your small client-side JS project (like I recently did for AnchorJS). Since there are dozens of ways to approach testing, here’s what I’d consider the key criteria for the setup we want:
- Written in Javascript - Javascript is what we know, so let’s write tests in Javascript using a framework written in Javascript.
- Behavioral testing in the browser - You’ll need more than just unit tests if your project interfaces with the Browser UI.
- Minimal dependencies - Grunt, Gulp, (etc) have a place, but if you’re maintaining a small library, then it’s probably overkill.
- Dependencies are easy to manage - Avoid installing tools globally, so the setup works the same on different machines.
- Uses modern testing tools - Our tools should be tried-and-true, well-supported, dependable, and robust.
- Open source workflow friendly - We want a solution that optimized for open source contribution workflows. Specifically, we want to automatically run tests for Github Pull Requests, using Travis CI (free for open source projects).
- Minimal viable infrastructure - Start the testing infrastructure out small, with the ability to grow it as needed.
Is this too much to ask? Not at all. Let’s get it set up.
Start with Jasmine and NPM
There are many Javascript-specific testing frameworks out there and I won’t do a comparison here (you can find several online). I’ll just say that after comparing the options with the criteria above for my own project, I landed on Jasmine. A bit of research will show that it is popular, mature, and covers all our client-side use cases.
We can use the NPM package manager to do several important things for us, like manage our testing dependencies and run our test commands. It’s also nice to make your library available for download on npm.
To start, we’ll use NPM to download Jasmine. Create and save a file called package.json, that looks like this:
{
  "name": "project-name",
  "description": "My Project's Description",
  "version": "0.0.1",
  "devDependencies": {
    "jasmine-core": "*"
  }
}
Then install the modules referenced by package.json:
npm install
This installs jasmine-core into a newly created directory in your project called node_modules. You’ll want to .gitignore this directory.
Now we’re going to set up minimum viable Jasmine testing. I like to keep all my testing stuff in a test folder that we can start out looking like this:
myproject
  |
  |--test
      |-- mySpec.js <----- We'll write our tests here
      |-- SpecRunner.html <--- We'll Run our tests here
In mySpec.js, just put a Hello World jasmine test in there, like this one found in Jasmine’s Documentation:
describe("A suite", function() {
  it("contains spec with an expectation", function() {
    expect(true).toBe(true);
  });
});
Then, in SpecRunner.html (we could name it anything, but this is the name used in some Jasmine packages), we just make a basic html document that links in Jasmine’s core files via script tags (as mentioned in their README).
<!DOCTYPE html>
<html lang="en">
  <head>
      <meta charset="UTF-8" />
      <title>Document</title>

      <link rel="shortcut icon" type="image/png" href="../node_modules/jasmine-core/lib/jasmine-core/jasmine_favicon.png">
      <link rel="stylesheet" href="../node_modules/jasmine-core/lib/jasmine-core/jasmine.css">

      <script src="../node_modules/jasmine-core/lib/jasmine-core/jasmine.js"></script>
      <script src="../node_modules/jasmine-core/lib/jasmine-core/jasmine-html.js"></script>
      <script src="../node_modules/jasmine-core/lib/jasmine-core/boot.js"></script>

      <!-- include the library you want to test here... -->
      <script src="../anchor.js"></script>

      <!-- include your test files here... -->
      <script src="mySpec.js"></script>
  </head>
  <body>
  </body>
</html>
Now you should be able to open SpecRunner.html in any browser, and the act of loading the page will run the tests in mySpec.js, and display the results. This is sufficient setup for you to read through Jasmine’s docs and write tests for features in your library. One note: You could add html in the body tag to test against, but since we’ll be automating this process, it’s better to dynamically create and delete markup in Jasmine’s beforeEach and afterEach functions. If your library works with the DOM a lot, you may want to look into a tool like jasmine-fixture.
Automating our Tests
Now we can write a variety of tests in Javascript and run them manually in any Browser. If you were to stop right here, you’d already be doing better than a large number of javascript projects. But we want the killer workflow, where Github Pull Requests are automatically tested by TravisCI before we decide to merge them.
To automate tests, we need to be able to execute a command that runs our tests against a real browser behind the scenes, and return the results back to us. To do this for client side javascript in a way that is both high-fidelity and fast is actually pretty challenging, and we’ll need to get some tools to help us. First we install PhantomJS, a stripped-down UI-free webkit browser that we can test against:
npm install --save-dev phantomjs-prebuilt
Update: it looks like the PhantomJS project will soon be unmaintained. While existing versions will probably still work for a while, you may want to look into headless Chrome or other options for UI testing.
Now we need a Test Runner… basically a command-line version of that SpecRunner.html file that will load the right files, run the tests, and report back the results. There are a few options out there. If you are already using grunt or gulp, then check out the integrations for those tools. Otherwise, we can save some complexity and go with a dedicated test runner like Karma (again, I’ll leave out the comparisons here, but it suffices to say that Karma is modern, popular, robust, and actively maintained).
We can bring in Karma with npm:
# This will add the modules to your package.json and install them.
npm install --save-dev karma karma-cli karma-jasmine karma-phantomjs-launcher
Note: Karma is highly decoupled, which is why we are downloading several small packages instead of a massive one. This architecture allows it to interface with many possible environments, browsers, and frameworks.
Karma setup is easy, just browse to our tests folder in your terminal and run $(npm bin)/karma init. Just answer the questions, and karma will generate the config file (karma.conf.js) for you (as a note: remember to indicate that we’re testing with Jasmine against the PhantomJS browser).
Finally, we just need to set up a simple “scripts” command in package.json.
"version": "0.0.1",
"scripts": {
    "test": "karma start test/karma.conf.js --single-run"
},
"devDependencies": {
Note: this is the last addition to package.json. I’ve saved the completed file as a gist for reference.
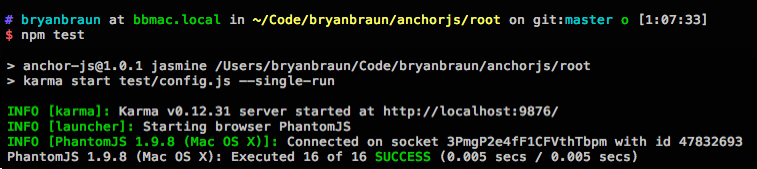
Now we can run our tests in the command line with npm test. If all goes well, it’ll look something like this:
Setting up Github and Travis CI
Now that we have automated tests, the final step is to connect it to Travis CI. You’ll want to sign into Travis CI with your github profile, and grant it access to your repo. Then in the top level of your repo, you’ll want to create a .travis.yml file, telling Travis what kind of project you have. Here’s the instructions, but in our case it’ll look like this:
language: node_js
node_js:
 - "stable"
Finally commit your changes and push your project, with it’s new test folder, package.json and .travis.yml files, up to Github. With some luck, Travis CI will see the code on your master branch and run the tests automatically (if not, you can trigger them manually through the TravisCI interface). Once you see it running, the final test is to submit a pull request against your master branch. You will know you are victorious, when you see this:
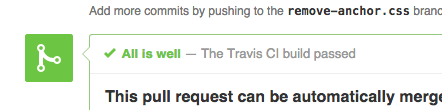
You can optionally add the Travis badge to your README.md, as a indicator that the tests are all passing.
![]()
Conclusion
With the tools and services available today, there is no excuse for not setting up automated testing on your client-side javascript project. It is a small upfront cost that will improve the quality of contributions and make long-term maintenance much easier.