How to Set Up a Simple Javascript Twitter Bot
I had an idea the other day for a Twitter account, but I wasn’t interested in investing the time to maintain it. Instead of letting the idea fizzle out, I thought, “why don’t I set up a Twitter bot to maintain it for the time being?” So that’s what I did.
Setting up the bot wasn’t very difficult but I noticed there weren’t many tutorials out there. Here, I walk you step-by-step through what I did.
1. Create your bot’s Twitter account
Go to twitter.com, and create a new account for your twitter bot. Use an email address and phone number that you’ll be able to access (for confirming that the account is real). Pro-tip: If you use gmail, you can use a + variant of your normal email address if you’d like (Twitter currently won’t let you use the same email address on two Twitter accounts).
After you are logged in with this Twitter new account, create a new Twitter list named ‘cool-people’, and add your normal Twitter account to the list. I’ll explain what this is for shortly.
2. Create a Twitter Application
You’ll need to build a “Twitter application” in order to get the permission needed to tweet on someone’s behalf. Don’t worry, it’s easy. Just browse to https://developer.twitter.com/app/new, log in via your new Twitter account (if you aren’t automatically logged in), and start filling out the forms.
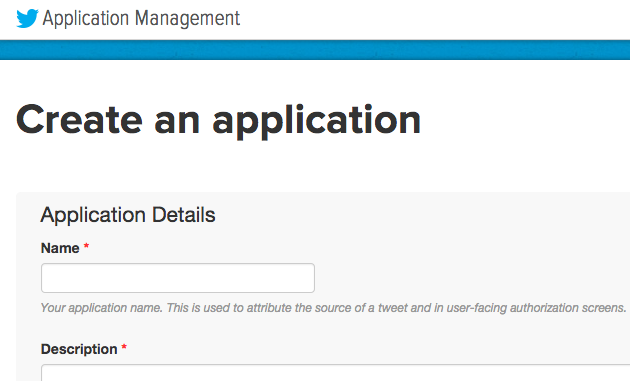
Many options, like Organization name, don’t matter much, but here are some of the important ones to look out for:
- Leave the “Callback URL” blank
- In the Permissions Section, set “Access Level” to “Read and Write”
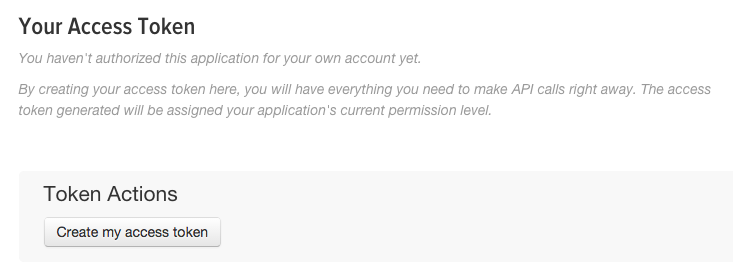
- Click “Create my Access Token” to authorize tweeting on behalf of your currently-logged-in Twitter account
Now, in the “Keys and Access Tokens” section, copy down the following credentials (you’ll need these later in the process):
- Consumer Key
- Consumer Secret
- Access Token
- Access Token Secret
3. Get your Twitter bot
Now you need a Twitter bot. Bots are just scripts of written code. They can be made with nearly any programming language, and they can be as simple or complex as the programmer wants. Naturally, there are a lot of different kinds of bots out there, capable of doing different things. The bot I made was written in Javascript (specifically, NodeJS), and it simply retweets any tweets that meet specific wording criteria (that you set), from the accounts listed on a Twitter list (that you specify). I released the code as an open source project named twitter-listbot, so we’ll use it in this tutorial.
You’ll want to use git to pull the twitter-listbot code down from Github. If you already have git installed, you can open a command line terminal and run these commands:
git clone https://github.com/bryanbraun/twitter-listbot.git
cd twitter-listbot
4. Edit your twitter-bot’s settings
You’ll need to customize a few settings in the bot in order for it to work for you. Open the file at twitter-listbot/index.js in your favorite text editor and substitute these values in the config object with your own:
me: "XXXXXXXXX", // Put the name of your new twitter account here (without the @ sign).
myList: "cool-people", // Put the name of your new twitter list here. You can get this from the page url when you are looking at the list on Twitter.
Now your bot will know to retweet the tweets of people in the cool-people list, using your new Twitter account.
5. Test the bot
To turn on the bot, first we need to download a few javascript dependencies, using npm. If you have npm installed, just run the following command in your command line:
npm install
You should see a bunch of activity in your console, downloading everything you need.
Now, let’s make sure your bot has access to the credentials it needs. Run the following four commands in your console window, replacing my placeholder values (the X’s) with the credentials you collected in step 2.
export TWITTER_CONSUMER_KEY=XXXXXXXXXXXXXX
export TWITTER_CONSUMER_SECRET=XXXXXXXXXXXXXX
export TWITTER_ACCESS_TOKEN_KEY=XXXXXXXXXXXXXX
export TWITTER_ACCESS_TOKEN_SECRET=XXXXXXXXXXXXXX
Note: this assumes you’re running a bash console. If your console is windows-based or otherwise, you’ll need to look up the equivalent command for setting environment variables for your system.
Now, run the bot code with nodeJS:
node index.js
You’ll probably see your console window, looking like it’s stuck processing something that won’t quit. That’s good. It’s listening for tweets coming in.
Now hop over to your original Twitter account (the one that was added to the list that the Twitter bot is listening to) and tweet something. Was it retweeted by your new account? If so… IT’S ALIIIIIIIVE!!!!
6. Move the bot to a server
You could leave the bot running on your computer, but it’s better to move it to some server on the internet where it will happily retweet things in isolation without you even thinking about it. I recommend using a service called Heroku because you can use their basic tier for free. Create a Heroku account at heroku.com, and then hop over to this guide, Getting Started with NodeJS on Heroku. You should be able to follow the guide loosely, deploying your Twitter bot code instead of the example code they provide.
One specific part that’s easy to overlook is moving your Twitter credentials into Environment Variables in Heroku. For that, you can follow these instructions, substituting the keys and values with the ones you used in step 5 above.
You’ll know the bot is running correctly when you visit your Heroku domain name (ex. http://yourappname.herokuapp.com) in your web browser and see the text “The robot is happily running.” And of course, the ultimate confirmation is that it will automatically retweet a tweet from somebody on your list.
7. Keep it awake
Our goal is for this Twitter bot to run without interference or manual intervention, but unfortunately Heroku has a cost-savings measure in place which puts your server (and your Twitter bot) to sleep if it hasn’t seen any web traffic in over an hour. To prevent this, we just set up an automatic service which visits your server periodically, keeping it awake. I recommend Uptime Robot for something small like this because it has a free tier.
Browse to https://uptimerobot.com/signUp, and sign up for an account. Once you are logged in, set up a new monitor and have it check your new Heroku domain (http://yourappname.herokuapp.com) with an interval of 5 minutes. Not only will this keep your bot awake, it will send you an email if your bot ever goes offline for more than 5 minutes.
Anything Else?
Nope. That’s it.
Again, what I’ve outlined is just one path to a working Twitter bot. With this bot in your control you can adapt the settings and code to make it do whatever you want. I used this process to build the bot behind @StoriesInData. If you decide to build your own, then let me know how it goes in the comments below.
Have fun!